
| Option | Description |
| CONFIG.DAEMON | Toggles MIDASa to fork off into background when started. |
| CONFIG.LOOPTIME | Delay between MIDASa checking for new Alerts. |
| CONFIG.DEBUGLEVEL |
This is the debug level. If specified it will debug into syslog. This is a bit level flag. Specified: 1 - Information |
| CONFIG.SQL.IP | The IP address to the MySQL server. |
| CONFIG.SQL.USER | This is the MySQL User name. |
| CONFIG.SQL.PASSWD | This is the MySQL Password. |
| CONFIG.SQL.DB | This is the MySQL DB name (Normally MIDAS2) |
| CONFIG.SQL.PORT | This is the MySQL port number (Normally 3306) |
| CONFIG.EMAIL.SERVER | The IP Address of the SMTP server to relay alert messages through. |
| CONFIG.EMAIL.SERVER.PORT | The port to use when connecting to the SMTP server. |
| CONFIG.EMAIL.DOMAIN | The Domain to be identified as during the SMTP session (HELO/EHLO) |
| CONFIG.EMAIL.FROM_ADDRESS | The From: address to use when sending the alert email. |
| CONFIG.EMAIL.HTML | Toggle send HTML email. If off Text email will be sent. |
| CONFIG.PAGER.SERVER | The IP address of the SNPP server to send alert pages through. |
| CONFIG.PAGER.SERVER.PORT | The port of the SNPP server. |
| CONFIG.TMPEXTERN | Specifies the file/path for the temp file used in the external alert. |
 Back to Top
| Option | Description |
| CONFIG.PORT | This is the port to listen on for Big Brother clients. |
| CONFIG.HID | This is the Host ID of this server. |
| CONFIG.DEBUGLEVEL | The Debug Level. Debug messages are sent to syslog. |
| CONFIG.DAEMON | Toggle if MIDASb should fork off into the background when started. |
| CONFIG.MAXFORKS | The Maximum number of Big Brother clients that are allowed to connect at once. |
| CONFIG.SERVERIP.IP | The IP address of the MIDASd server to connect to. |
| CONFIG.SERVERIP.IP.PORT | The Port number of the MIDASd server to connect to. |
| CONFIG.SERVERIP.IP.FAILOVER | Toggle fail over. If fails to connect then attempt to connect to the next server specified. |
| CONFIG.ACCESSIP.IP | Thi is the network IP address used to specify the IP range(s) that are allowed to connect. |
| CONFIG.ACCESSIP.IP.MASK | This is the Mask used on the specified network IP address. |
| CONFIG.BBCHECK.NAME | BigBrother service name to match. |
| CONFIG.BBCHECK.NAME.CID | MIDAS Check ID to match NAME to. |
| NOTE: You may specify the IP and MASK multiple times to allow different IP blocks. | |
 Back to Top
| Option | Description |
| CONFIG.HID | The Host HID for this client. |
| CONFIG.CMD.DISK | The command to use for checking Drive usage (df). |
| CONFIG.CMD.PROC | The command used to check process usage (ps). |
| CONFIG.CMD.LOG | The command used to check logs (tail). |
| CONFIG.CMD.PING | The command used for ping checks (ping). |
| CONFIG.CMD.RAM | The command used to check RAM usage (free). |
| CONFIG.DBFILE.LOG | The path and filename of the log check db file. |
| CONFIG.DBFILE.LOG.CACHESIZE | The maximum number of log entries to store in the log db. |
| CONFIG.DBFILE.MD5 | The path and filename of the MD5 check db file. |
| CONFIG.SERVERIP.IP | The IP address of the MIDASd server to connect to. |
| CONFIG.SERVERIP.IP.PORT | The Port number of the MIDASd server to connect to. |
| CONFIG.SERVERIP.IP.FAILOVER | Toggle fail over. If fails to connect then attempt to connect to the next server specified |
| CONFIG.DEBUGLEVEL |
This is the debug level. If specified it will debug into syslog. This is a bit level flag. Specified: 1 - General Information 2 - Errors 4 - Check processing 16 - Socket 32 - MD5 check 64 - Disk check 128 - CPU load check 256 - Log check 512 - Process check 1024 - External checks 2048 - Network checks 4096 - XML 8192 - Forking |
| CONFIG.MAXFORKS | The maximum number of processes to fork when performing checks |
| CONFIG.CHECKINTERVAL | The delay in seconds between check cycles |
| CONFIG.DAEMON | Toggle MIDASc to fork to the background when started. |
 Back to Top
| Option | Description |
| CONFIG.PORT | This is the port that MIDASd will listen on. |
| CONFIG.HID | This is the Host ID of this host. |
| CONFIG.SQL.IP | The IP address to the MySQL server. |
| CONFIG.SQL.USER | This is the MySQL User name. |
| CONFIG.SQL.PASSWD | This is the MySQL Password. |
| CONFIG.SQL.DB | This is the MySQL DB name (Normally MIDAS2). |
| CONFIG.SQL.PORT | This is the MySQL port number (Normally 3306). |
| CONFIG.DEBUGLEVEL |
This is the debug level. If specified it will debug into syslog. This is a bit level flag. Sepcified: 1 - General Information 2 - Errors 4 - SQL 8 - Socket 16 - Check Processing 32 - Process Forking 64 - XML Processing |
| CONFIG.MAXFORKS | This is the maximum number of processes to fork off for incoming processes. |
| CONFIG.DAEMON | Toggle on/off MIDASd from forking off into the background when started. |
| CONFIG.ACCESSIP.IP | This is the network IP address used to specify the IP range(s) that are allowed to connect. |
| CONFIG.ACCESSIP.IP.MASK | This is the Mask used on the specified network IP address. |
| CONFIG.MAINT.INTERVAL | Maint Cycle interval time (in seconds). |
| CONFIG.MAINT.MAKEBLUE | Minutes from last status update before a check is moved to BLUE status. |
| CONFIG.MAINT.CHECKEVENTS | Expire check event records older then X days (0 to disable). |
| CONFIG.MAINT.IDSEVENTS | Expire IDS event records older then X days (0 to disable). |
| CONFIG.MAINT.MACIP | Expire MAC/IP records that are older then X hours (0 to disable). |
| NOTE: You may specify the IP and MASK multiple times to allow different IP blocks. | |
 Back to Top
| Option | Description |
| CONFIG.HID | The Host HID for this client. |
| CONFIG.DEBUGLEVEL |
This is the debug level. If specified it will debug into syslog. This is a bit level flag. Sepcified: 1 - General Information 2 - Socket 4 - XML Processing 8 - Check Processing 16 - Process Forking |
| CONFIG.SERVERIP.IP | The IP address of the MIDASd server to connect to. |
| CONFIG.SERVERIP.IP.PORT | The Port number of the MIDASd server to connect to. |
| CONFIG.SERVERIP.IP.FAILOVER | Toggle fail over. If fails to connect then attempt to connect to the next server specified |
| CONFIG.DAEMON | Toggle MIDASn to fork to the background when started. |
| CONFIG.ETHDEV | Configures which device MIDASn will watch. |
| CONFIG.USER | Run MIDASn with this user (User is switched after NIC is configured). |
| CONFIG.PROMISC | Toggles if MIDASn should attempt to set NIC to promiscuous mode on startup. |
| CONFIG.SENDINTERVAL | # of seconds between sending stat updates. |
| CONFIG.MAIN.SESSIONS | Specifies the expire time (in days) for Network sessions. |
 Back to Top
| Option | Description |
| CONFIG.HID | The Host ID of this server. |
| CONFIG.SNORT.CMD | The command line to use to start snort. Other then changing the path the command args should be left as default. |
| CONFIG.SNORT.DB | The file and path to the Snort Packet DB file. |
| CONFIG.SNORT.DB.CACHESIZE | The number of packets to cache in DB file. |
| CONFIG.SERVERIP.IP | The IP address of the MIDASd server to connect to. |
| CONFIG.SERVERIP.IP.PORT | The Port number of the MIDASd server to connect to. |
| CONFIG.SERVERIP.IP.FAILOVER | Toggle fail over. If fails to connect then attempt to connect to the next server specified. |
| CONFIG.DEBUGLEVEL |
This is the debug level. If specified it will debug into syslog. This is a big level flag. Specified: 1 - Information 2 - Snort 4 - Socket 32 - XML |
| CONFIG.DAEMON | Toggle MIDASs to fork to the background when started. |
 Back to Top
 |
| Figure 3.1 - WebView Login Screen |
 Back to Top
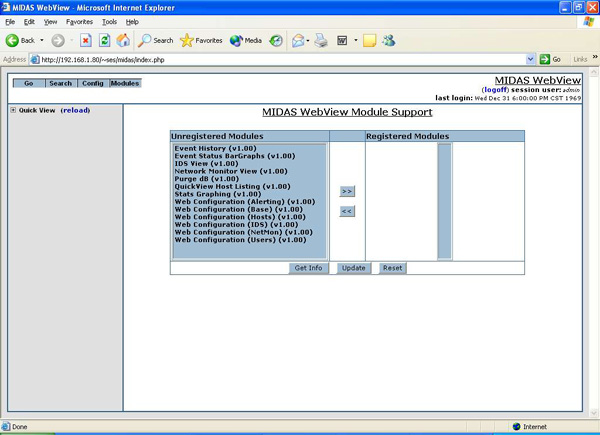 |
| Figure 3.2 - Register/Unregister Modules |
 Back to Top
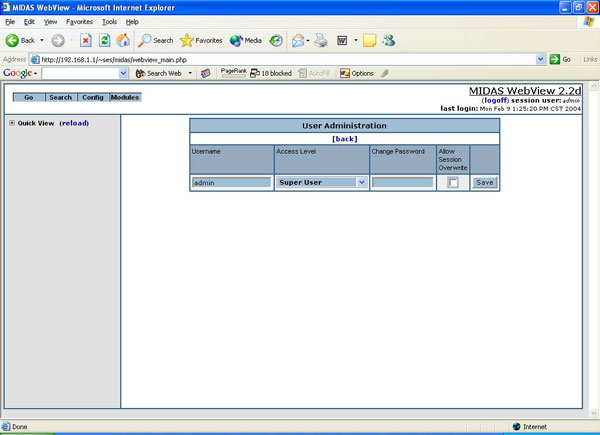 |
| Figure 3.3 - User Administration - Adding a new user |
 Back to Top
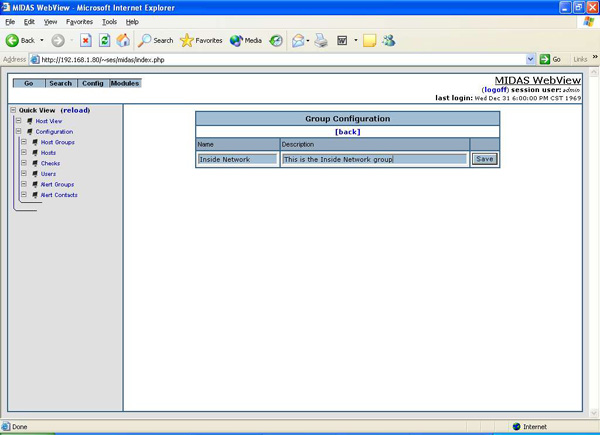 |
| Figure 3.4 - Adding a Host Group |
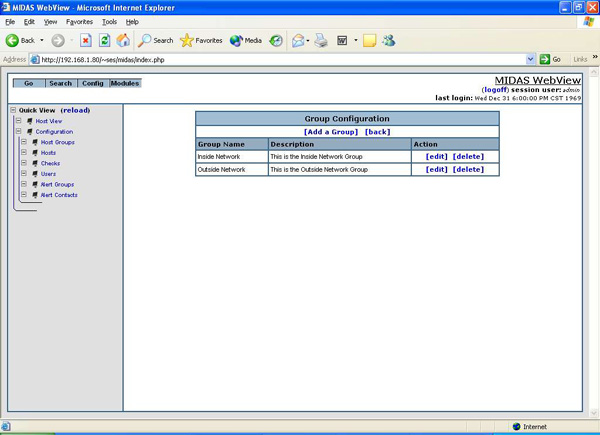 |
| Figure 3.5 - Viewing Host Group List |
 Back to Top
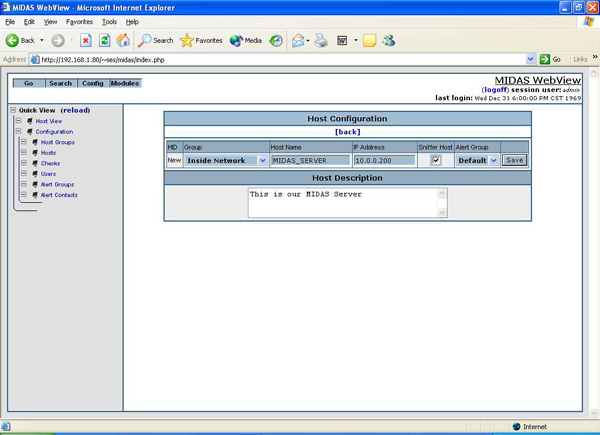 |
| Figure 3.6 - Add Host Page |
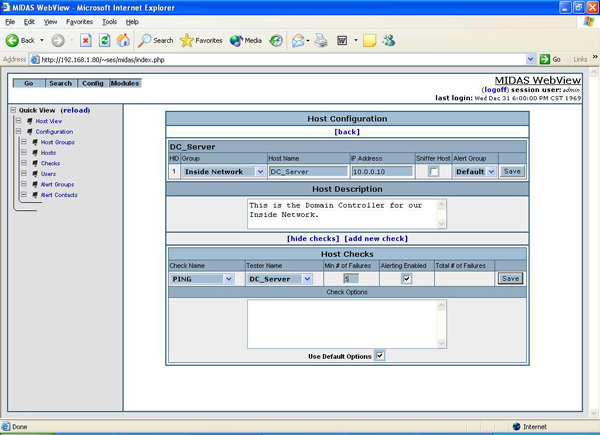 |
| Figure 3.7 - Add Host Check |
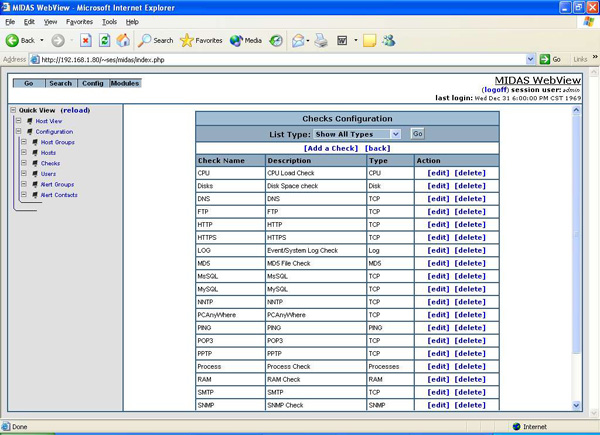 |
| Figure 3.8 - MIDAS Check List |
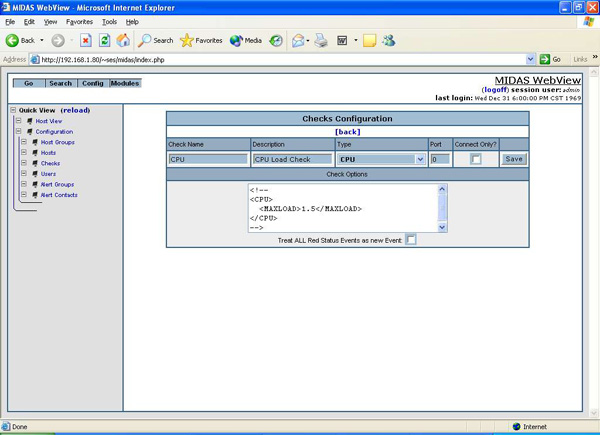 |
| Figure 3.9 - Add/Modify Check |
 Back to Top
| Check | Option | Description |
| CPU.MAX_LOAD | The maximum load before an alert is generated. | |
| DISK.PARTITION | The Partition/Mount point/device to check | |
| DISK.PERFREE | Minimum % free. | |
| DISK.PERUSED | Maximum % used. | |
| DISK.SPACEFREE | Minimum Space free. | |
| DISK.SPACEUSED | Maximum Space used. | |
| LOG.LOGFILE | Filename and path of log file to check. | |
| LOG.LOGIC | Logic (EQUAL, NOTEQUAL, LESS, GREATER) to use when comparing results of REGEX to EXPECT. | |
| LOG.REGEX | The extended regular expression to use when checking log lines. | |
| LOG.EXPECT | What to Expect/Compare against. | |
| LOG.NUMLINES | Number of lines off the end of log file to check. | |
| PROC.TYPE | Type of Check: COUNT, ZOMBIE, PRESENT, ABSENT. | |
| PROC.NAME | Name of process (Only used with PRESENT/ABSENT). | |
| PROC.LIMIT | Max # of processes (Only used with COUNT/ZOMBIE). | |
| RAM.RAMFREE | Minimum amount of RAM free. | |
| RAM.SWAPFREE | Minimum amount of Swap free. | |
| MD5.PATH | File/Directory to check. | |
| MD5.RECURSIVE | Toggle if this check should recurse through sub directories. | |
| PING.COUNT | Number of packets to send. | |
| SNMP.COMMUNITY | The SNMP Community to use. | |
| SNMP.OID | The numeric SNMP OID to check. | |
| SNMP.LOGIC | Logic (EQUAL, NOTEQUAL, LESS, GREATER) to use when comparing the results. | |
| SNMP.EXPECT | What to Expect/Compare against. | |
| SNMP.TYPE | This value determines the type of RRD database that is created to store the retured values generated by this check. Valid options are: GUAGE, COUNTER, COUNTER32 and ABSOLUTE | |
| SNMP.FORMAT | used to specify how the result should be formated. Currently supports TIMETICKS and BYTES. TIMETICKS is used for Uptime style counters and BYTES is used for formating results into Byte strings (ie 12345 -> 12.30KB). | |
| EXTERNAL.COMMAND | The filename and path to the application to run. | |
| EXTERNAL.LOGIC | Logic (EQUAL, NOTEQUAL, LESS, GREATER) to use when comparing the results of REGEX to EXPECT. | |
| EXTERNAL.REGEX | The extended regular expression to use when checking the output of the CMD. | |
| EXTERNAL.EXPECT | What to Expect/Compare against. | |
| EXTERNAL.COMMAND | The command line and arguments to the netsaint plug.in. | |
| SEND | What to send to the port after connecting (Used only with required connection port checks). |
 Back to Top
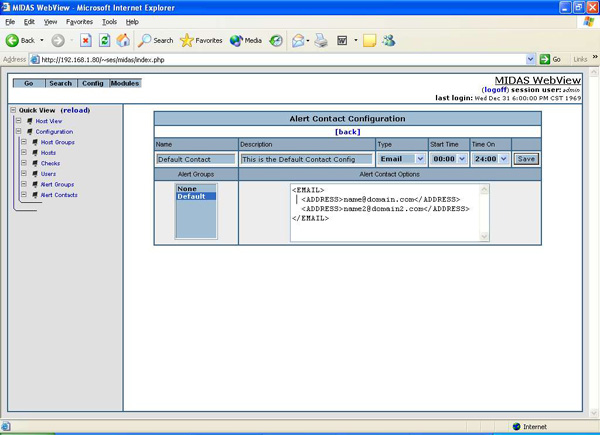 |
| Figure 3.10 - Adding an Alert Contact |
 Back to Top
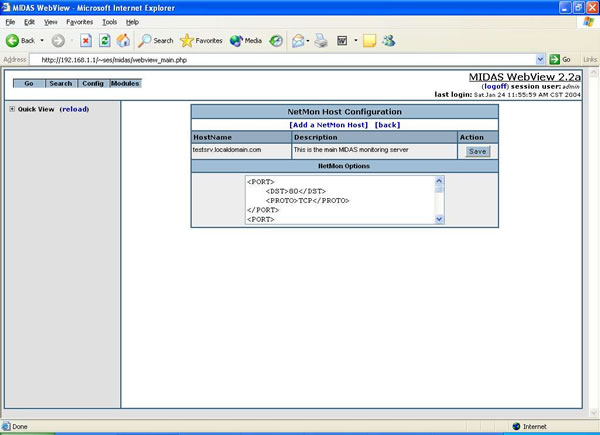 |
| Figure 3.11 - Network Monitoring Options |
 Back to Top
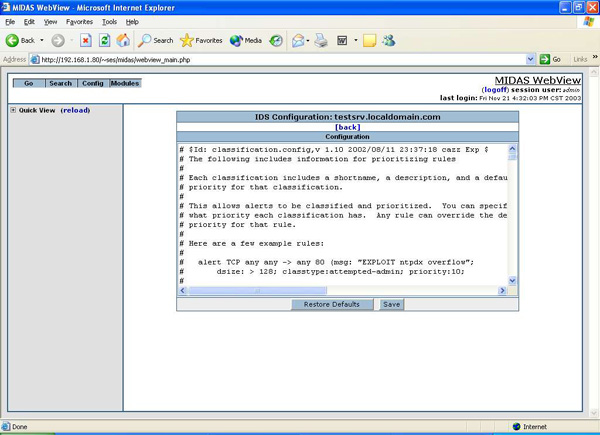 |
| Figure 3.12 - Intrusion Detection Configuration Screen |
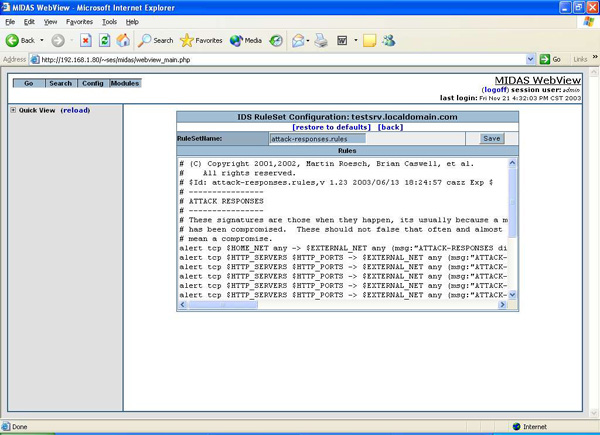 |
| Figure 3.13 - Intrusion Detection Rule Set Screen |
 Back to Top
 Back to Top